While there’s a lot more involved with launching a business than creating a website, establishing a domain and visualizing a website are among the early activities.
Many businesses start with a simple site of five or six pages, each accessible directly from the top navigation bar. As your business matures, you may introduce new services, create additional content and add team members. Perhaps you launch a blog with topic categories to help users find posts of interest.
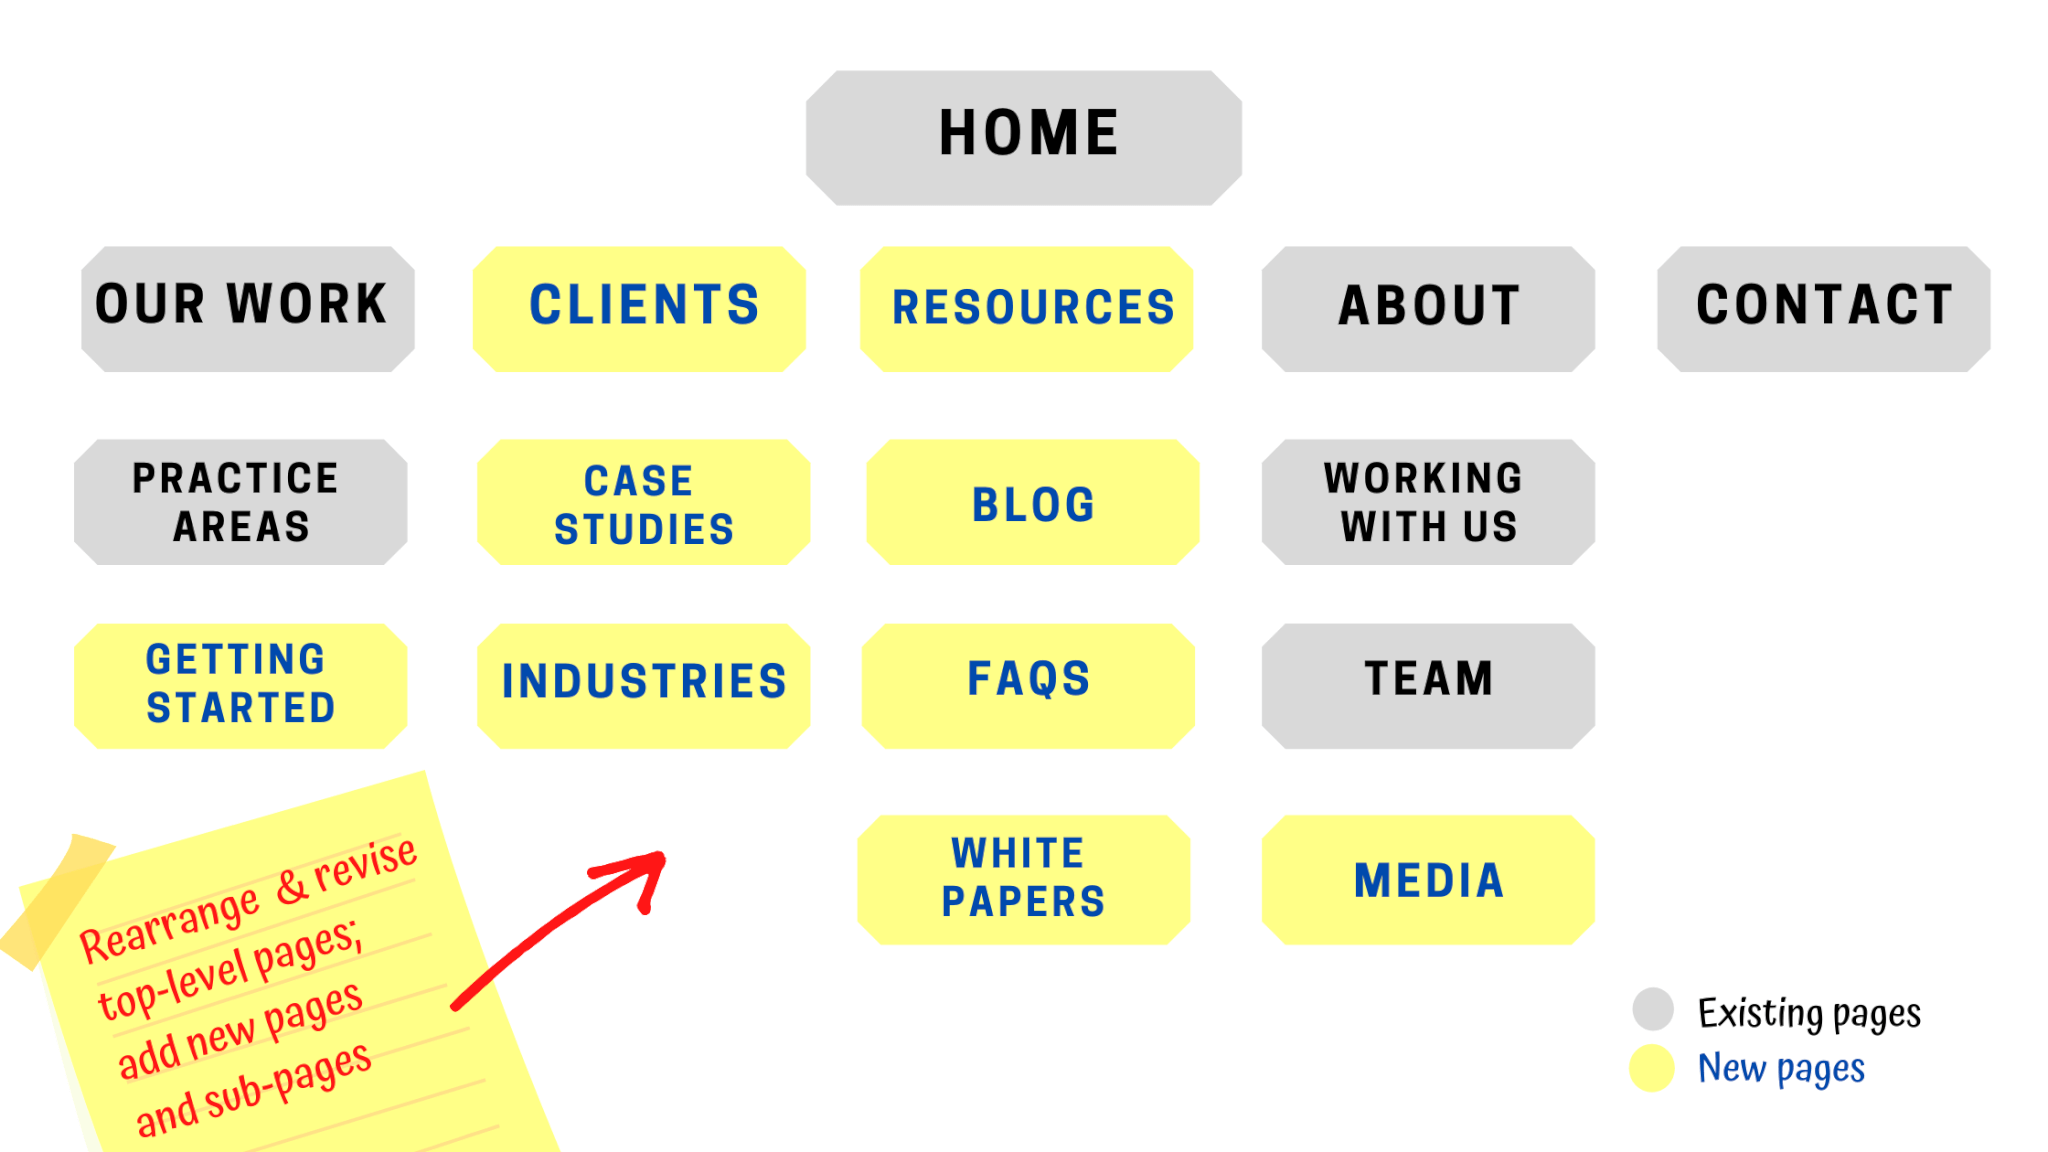
As your body of content grows, it is important to build a logical site architecture which arranges your content hierarchically and naturally guides your website visitor to deeper content. Embedded contextual links and sub-pages offer additional relevant and timely information.
Create your new page first
To create a new page (or blog post) in your WordPress site, sign in to the back end. Then select Pages (or Posts) and Add New on the left sidebar. After adding your content, click Publish. Upon doing so, the page or post is live on your website, but to be easily found by users, it must be added to your website menu.
The Menu Editor
The next step subsequent in creating new customer-facing website pages is to place the content logically. For WordPress websites, in the admin area of your site, the built-in Menu Editor enables you to add, delete and rearrange your website pages. The Menu Editor is found within the Appearance menus.
When logged in to the back end of your site, on the left sidebar, find Appearance and select Menus. The Menus section has two tabs: Edit Menus and Manage Locations. These tabs represent the steps you will need to take when adding pages to your website.
The items listed in your site’s Menu can include pages and blog posts, as well as other types of pages, such as testimonials or blog category pages.
Add pages using the Edit menus
To add a newly created page to your website, start with the Edit Menus tab. Go to the Add menu items section and click the down arrow next to Pages.
Within the Pages menu, you’ll see a list of Most Recent pages, where you’ll find your newly created page(s). To add these pages to your menu architecture, select one at a time, and click the Add to menu button.
If your new page is a landing page or a thank-you page, there’s no need to include the page in the site architecture.
Logically locate and rearrange pages
Next, look at the right side of the Menus page for the Menu structure section. This is where you configure your site architecture, adding the new pages you’ve created and/or rearranging your existing pages and sub-pages.
Any new page that you add will automatically be placed on the bottom of the menu structure (listing of your site pages). Drag and drop the page into the appropriate location.
Guide your visitor to the new content
While website visitors start with the top navigation, many wander a bit once they land on your website. Help them to find your new content by thinking like your website visitor. Utilize embedded contextual links to guide visitors to additional detail and related content.
Also utilize off-page SEO and content marketing strategies — including blog articles, social media posts and email marketing — to drive traffic to your new content.
Ready to dive in?
Learn more about optimizing your website with these posts.
4 Tidbits of Wisdom for WordPress
Is Your Website A Map or a Maze?
More posts about website optimization